Thursday, November 11, 2010
Another new mold
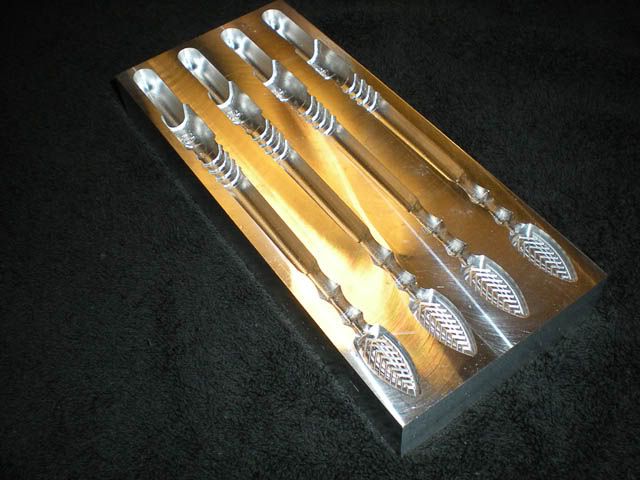
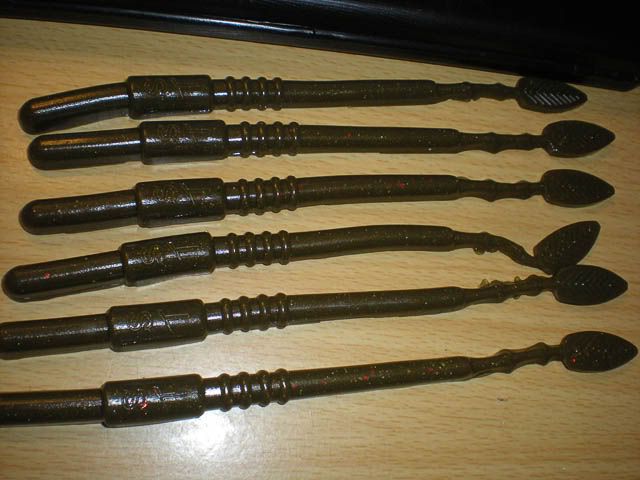
I just did a 7 cavity 5" slug/stickbait mold and a 5 cavity 2.5" jerkshad. This is on the back of the material I used to do the dropshot worm last week. Can't wait to see these in the water.

Sunday, November 7, 2010
Leadhead Molds
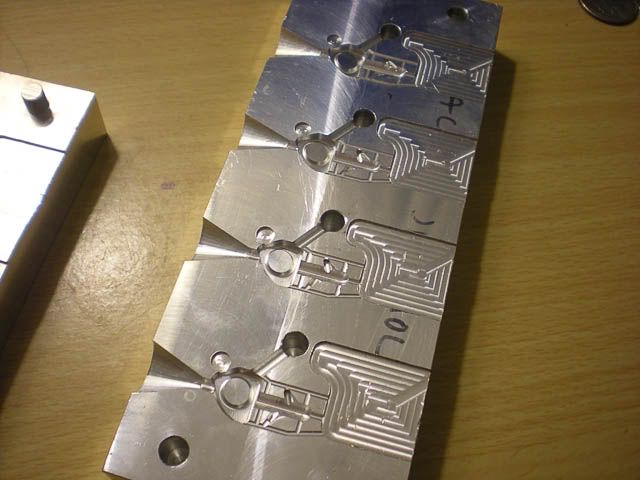
These are my first attempts at making leadhead molds. They came out great considering I had never worked with the lead material before. They need a little fine tuning. Mostly I needed smaller vents since they flashed over. For the vents I made a .010 deep groove with a 1/16 ball mill on each side. Obviously, that was a little too much.. I need to make them a little smaller.
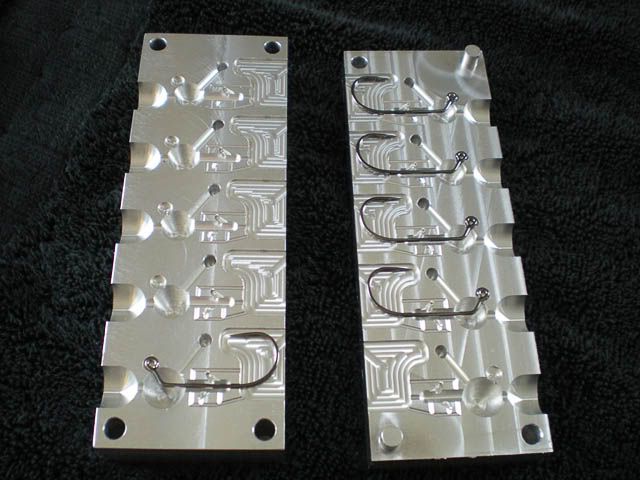
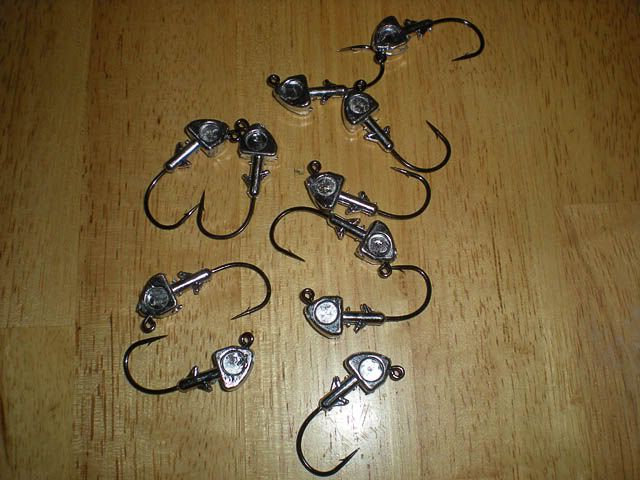
Football head mold:
It has 1 1/4 oz cavity, 2 3/8 oz cavities, 1 1/2 oz cavity, and 1 3/4 oz cavity.


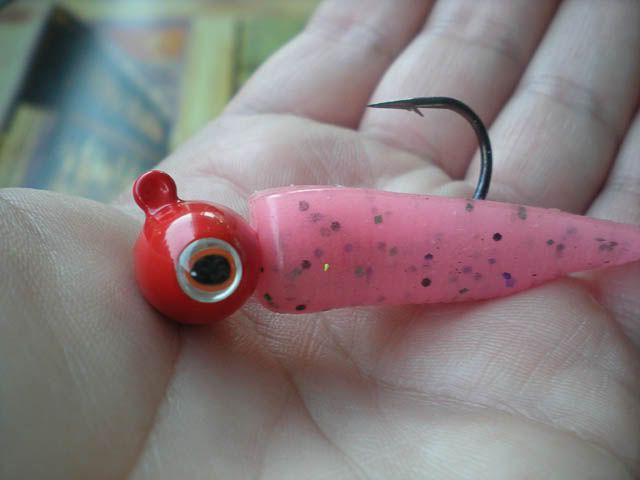
A completed and painted 3/4 oz football head.

And here is my shad head mold with eye sockets:


Some finished castings:

Football head mold:
It has 1 1/4 oz cavity, 2 3/8 oz cavities, 1 1/2 oz cavity, and 1 3/4 oz cavity.

A completed and painted 3/4 oz football head.
And here is my shad head mold with eye sockets:
Some finished castings:
Friday, November 5, 2010
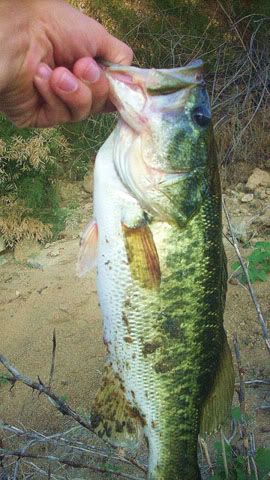
Success
I just got a report from the guy I made the "Spinal Tap" worm mold for and he says it's been working great and he's caught quite a few bass with it.
Here's a picture of one of them: Not really a lunker but you really can't expect one in just a few sessions!

Here's a picture of one of them: Not really a lunker but you really can't expect one in just a few sessions!
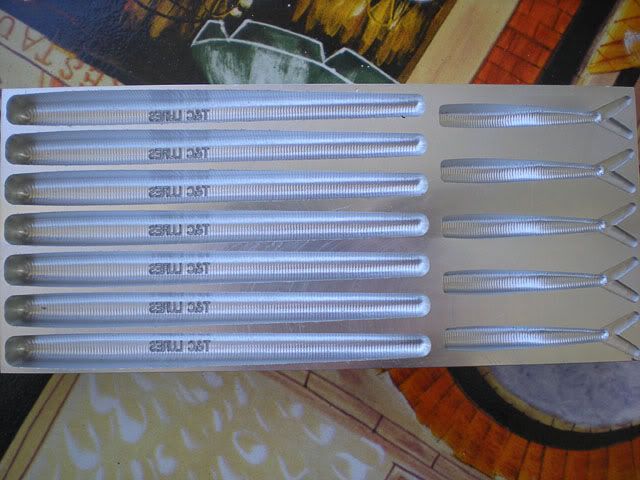
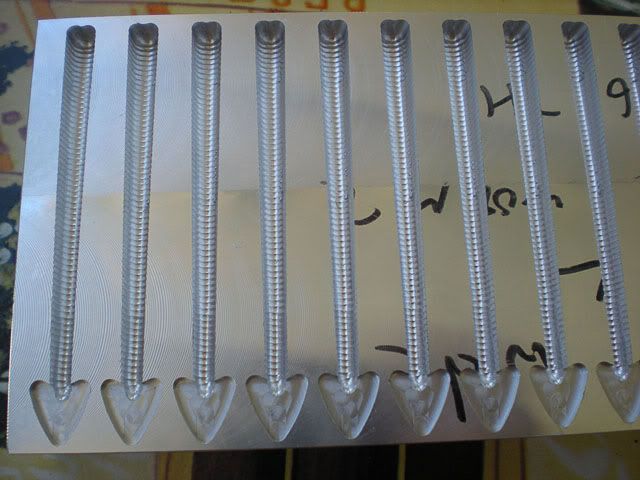
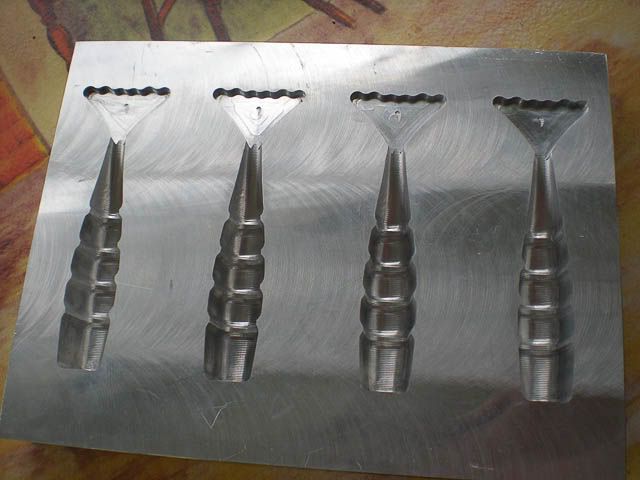
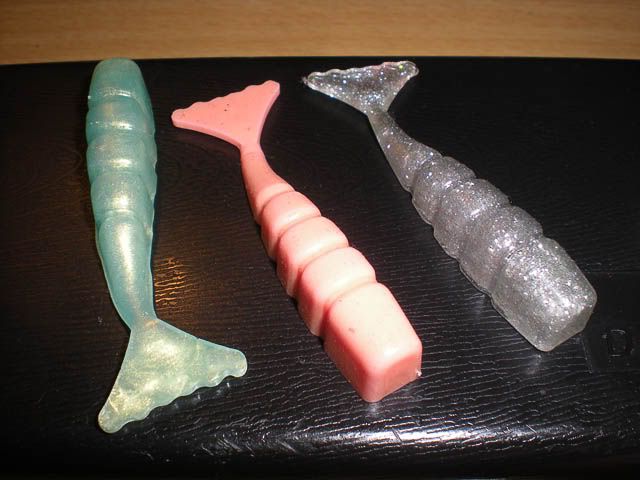
Drop Shot Worm
This is my new drop shot worm mold. It's 3 1/4 inch long and thin. Should have great action. For the finish I used a parallel toolpath with my favorite 1/8" atrax ball mill and a .045 step over. I got a small burr on the the tail pocket which will need to be sanded down but I was trying to save time. I usually get away without any burrs on the pockets now since I give the finish G41 pass a 1/2 the normal feed rate.


Friday, October 22, 2010
Shrimp
I made this little shrimp mold today with some scrap metal I had on hand.
It's based on a clay model my friend gave me. Of course I had to change a few things to make it work. The sharp corners had to be omitted because those would be impossible without EDM. It came out great, though. Once again I had to use the extra length 1/8 ball mill for the surfacing and deal with the chatter but it came out well. I used a parallel finish with a .015 stepover.


Here is a picture of the finished product!
Now to just test it out and hope it catches some fish.

It's based on a clay model my friend gave me. Of course I had to change a few things to make it work. The sharp corners had to be omitted because those would be impossible without EDM. It came out great, though. Once again I had to use the extra length 1/8 ball mill for the surfacing and deal with the chatter but it came out well. I used a parallel finish with a .015 stepover.

Here is a picture of the finished product!
Now to just test it out and hope it catches some fish.
Wednesday, October 20, 2010
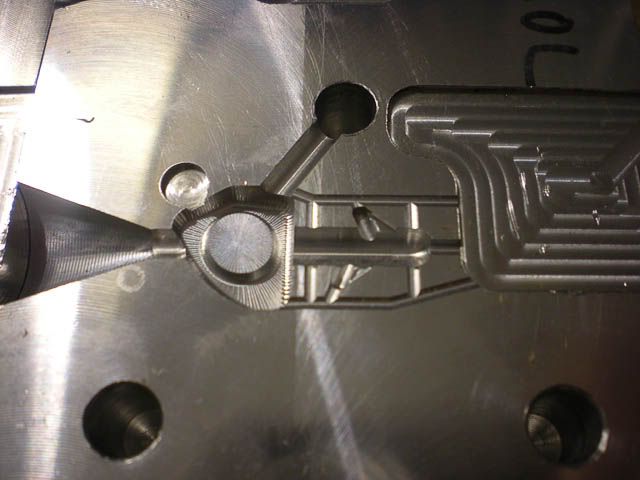
"Spinal Tap" Worm
This is my latest project. A 7.5" long bass worm I milled out for a fellow fisherman who frequents my favorite fishing forums.
He gave me a pdf scan of a hand pencil drawing to work with and I plugged it into solidworks to take some general measurements with. He actually drew it to scale and besides not using a ruler he did a pretty good job for someone not familiar with blueprints or the machining process. He had quite a few sharp corners that would be impossible do to without EDM so we had to work out a few changes but I think it came out pretty faithful to his drawing otherwise.

I'm really pleased with the way it came out. The final finish didn't turn out quite as well as I had expected as the finish on one side of the worm showed some tool deflection. I was using an extra long flute length carbide 1/8" ball mill for the finish with high feed. The surface finish is always poorer with high feed but I was expecting better since I only allowed it to ramp up to a 80ipm max feed instead of the Haas mill's max feed rate.
The tail of the worm is the only part that isn't done with a surfacing toolpath, I added a chevron pattern of slots onto his design that I think look really neat.

The finish looks great on the final molded worm, however, as it gives it kind of a digital look.

He gave me a pdf scan of a hand pencil drawing to work with and I plugged it into solidworks to take some general measurements with. He actually drew it to scale and besides not using a ruler he did a pretty good job for someone not familiar with blueprints or the machining process. He had quite a few sharp corners that would be impossible do to without EDM so we had to work out a few changes but I think it came out pretty faithful to his drawing otherwise.
I'm really pleased with the way it came out. The final finish didn't turn out quite as well as I had expected as the finish on one side of the worm showed some tool deflection. I was using an extra long flute length carbide 1/8" ball mill for the finish with high feed. The surface finish is always poorer with high feed but I was expecting better since I only allowed it to ramp up to a 80ipm max feed instead of the Haas mill's max feed rate.
The tail of the worm is the only part that isn't done with a surfacing toolpath, I added a chevron pattern of slots onto his design that I think look really neat.

The finish looks great on the final molded worm, however, as it gives it kind of a digital look.
Subscribe to:
Comments (Atom)